
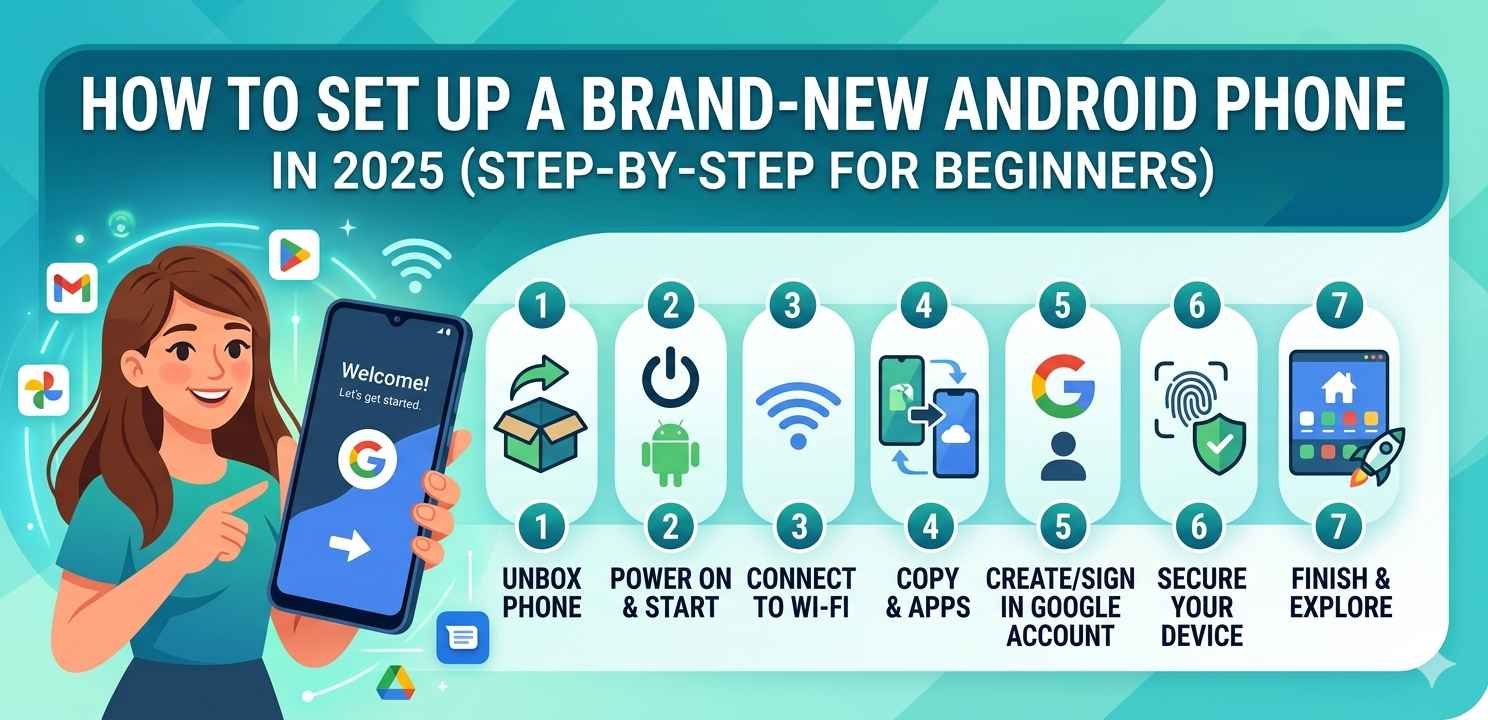
There’s something genuinely exciting about unboxing a new Android phone. But that excitement can shift into confusion pretty fast once the setup screen appears and you’re not quite sure what to tap first. Don’t worry — this guide is here to walk you through how to set up a brand-new Android phone in 2025, step by step, in plain language that any beginner can follow.
Whether this is your very first smartphone or you’re switching from an older device, the process is pretty much the same. Let’s go through it.
Before You Start: What You’ll Need
Before you set up a brand-new Android phone, gather a few things. You’ll need your Wi-Fi password, a Google account (or you can create one during setup), and if you’re transferring data from an old phone, that phone should be nearby and charged.
You don’t need to be a tech expert. The Android setup wizard guides you through most of it. This guide just explains what each step actually means, so you’re not guessing.
Step 1: Power On and Choose Your Language
Press and hold the power button until the screen lights up. The first thing you’ll see is a welcome screen with a language selection option.
Tap on your preferred language. For most people this is simple — just pick English or whatever language you’re most comfortable with. Then tap Start or Get Started to begin the setup process.
This is the first step to set up a brand-new Android phone, and it’s the easiest one.
Step 2: Insert Your SIM Card (If Not Already Done)
Some phones prompt you to insert a SIM card early in the setup. If you haven’t already, use the SIM eject tool (usually included in the box) to open the SIM tray on the side of the phone. Place your SIM card in the correct slot and close it.
If your phone supports eSIM, you might have the option to scan a QR code from your carrier instead. Either way, your carrier details will be recognized automatically once the SIM is in.
You can skip this during setup and add it later, but it’s better to get it done now so your phone number and mobile data are ready.
Step 3: Connect to Wi-Fi
Next, you’ll be asked to connect to a Wi-Fi network. Tap on your home or office network name, enter the password, and tap Connect.
A stable Wi-Fi connection is important here. During the setup process, your phone will download updates, sync account data, and restore apps — all of which use a decent amount of data. Using Wi-Fi instead of mobile data just makes this smoother.
This step is important when you set up a brand-new Android phone because most of the heavy downloading happens right here in the background.
Step 4: Sign In to Your Google Account
This is probably the most important step. Android is built around Google services, so signing in to your Google account unlocks the full experience — access to the Play Store, your contacts, Gmail, Drive, and more.
Tap Sign in, enter your Gmail address, then your password. If you don’t have a Google account yet, tap Create account and follow the prompts. It only takes a few minutes to make one.
If you’re someone who cares about privacy, you can skip Google sign-in for now, but you’ll have limited access to apps and services. Most people sign in.
Once you’re signed in, Google may ask you to verify your identity through a code sent to your recovery email or phone number. Just follow the on-screen steps.
Step 5: Restore From a Backup or Start Fresh
After signing in, Android will ask if you want to restore from a backup or set up the phone as new. This is a key decision when you set up a brand-new Android phone.
Restore from backup: If you’re coming from an old Android phone and had Google Backup turned on, your apps, contacts, and settings can be restored automatically. Just select the backup and tap Restore.
Set up as new: If this is your first Android phone or you prefer a clean start, choose this option. You’ll install apps manually later.
Either option is fine. Restoring from backup saves time. Starting fresh gives you a clean slate.
Step 6: Set Up Screen Lock and Biometrics
Next, you’ll be asked to set up a screen lock. This is how you protect your phone if it’s ever lost or picked up by someone else.
You’ll usually have a few options: PIN, pattern, or password. Pick whichever you’ll actually remember. After setting the lock, you’ll typically be prompted to also set up a fingerprint or face unlock — these are faster ways to open your phone day-to-day without typing a PIN every time.
Take your time here. A good screen lock is the most basic security step every phone should have.
Step 7: Review Google Services Settings
At this point, Android shows you a screen with toggles for various Google services — things like location history, device backup, and usage data sharing.
Read through these. You don’t have to turn everything on. Location can stay on for maps and navigation. Backup is genuinely useful — it means if your phone is lost or damaged, your data can be restored. Usage data sharing is optional and mostly for improving Google’s systems; you can turn it off if you prefer.
These settings can always be changed later from Settings > Google. Nothing here is permanent.
Step 8: Set Up Google Assistant (Optional)
You may be prompted to activate Google Assistant during setup. This is the voice-activated helper that responds when you say “Hey Google.” If you find voice assistants useful, follow the setup steps — it asks you to speak a few phrases to recognize your voice.
If you’d rather skip it, tap No thanks or Not now. You can always enable it later from the Google app settings.
Step 9: Choose Your Home Screen Style and Wallpaper
Once the main setup is done, some Android phones — especially Samsung, Pixel, or OnePlus — will guide you through a brief personalization screen. You might be asked to pick a wallpaper, a home screen layout, or a theme.
This is optional but fun. Take a moment to make the phone feel like yours. You can always change any of this later by long-pressing on your home screen.
Step 10: Download Your Essential Apps
Now your phone is set up and ready. Open the Google Play Store (the colourful shopping bag icon) and search for the apps you use most — WhatsApp, Instagram, your banking app, whatever you need.
If you restored from a backup, most of your apps will already be downloading in the background. Give it a few minutes and they’ll appear on your home screen.
First Settings to Check After Setup
Once you’ve completed the setup, here are a few settings worth visiting right away to properly set up a brand-new Android phone for daily use.
Display brightness and font size: Go to Settings > Display and adjust brightness, text size, and screen timeout to your comfort.
Notifications: Go to Settings > Notifications and review which apps are allowed to send you alerts. Reducing noise from unnecessary apps makes a real difference.
Battery saver and adaptive battery: Under Settings > Battery, turn on Adaptive Battery. It learns your usage patterns and limits battery drain from apps you rarely use.
Storage check: Go to Settings > Storage to see how much space is available and whether anything is already taking up room.
You don’t need to do all of this at once. But spending ten minutes on these after you set up a brand-new Android phone will save you small annoyances later.
Final Conclusion
Setting up a new Android phone in 2025 is actually a well-designed experience — Google and phone manufacturers have made it pretty beginner-friendly. The key is just knowing what each step is asking you to do. From the welcome screen all the way to downloading your first apps, this guide covered everything you need to confidently set up a brand-new Android phone without guessing.
Once it’s done, you’ll have a phone that’s signed in, secured, backed up, and ready for everyday use. That’s a solid foundation to build on.