
Ever picked up your Android phone, tried to snap a quick photo, and then boom – a message pops up saying “Storage Full”? It’s frustrating, isn’t it? That little notification can feel like a roadblock, stopping you from doing what you want to do with your own device. As someone who’s spent a lot of time diving deep into how these phones tick, I can tell you this isn’t just a minor annoyance; it can really slow your phone down and impact your daily digital life.
This common problem isn’t always about needing a new phone. More often than not, it’s about understanding what’s taking up space and how to manage it effectively. Think of your phone’s storage like a closet. Over time, it gets filled with clothes, shoes, and forgotten items. If you don’t clean it out once in a while, you can’t fit anything new in, and finding what you need becomes a nightmare. Your Android phone is pretty much the same.
In this guide, we’ll walk through what “Android storage full” really means, why it happens so often, and most importantly, how to tackle it head-on. We’ll look at practical, real-world solutions that don’t require you to be a tech wizard, just someone willing to make a few adjustments to keep their phone running smoothly.
Understanding Your Android Phone’s Storage
Before we start deleting things, it’s helpful to get a grip on what kind of storage your phone actually has. When your phone says “storage full,” it’s usually referring to its internal storage. This is like the phone’s built-in hard drive, where your operating system, apps, photos, videos, and documents live. It’s distinct from something called RAM, which is your phone’s short-term memory for running apps, and also different from an external SD card, which some phones have as an optional add-on for extra space.
Most modern Android phones come with a set amount of internal storage – maybe 64GB, 128GB, or even 256GB. It might sound like a lot when you buy it, but trust me, it fills up faster than you’d expect. A significant chunk of that space is already taken up by the Android operating system itself and pre-installed apps. So, that 128GB phone might only have 110GB usable from the start. Knowing this helps set realistic expectations for how much “free” space you actually have to work with.
Why Your Android Storage Gets Full So Quickly
It feels like just yesterday you got your phone, and now it’s constantly complaining about storage. There are a few main culprits behind this common issue, and understanding them is the first step toward a lasting solution.
Apps and Their Growing Appetite
Every app you install, from social media to games, takes up space. But it’s not just the app itself; over time, these apps accumulate data. Think about your messaging app. All those photos and videos shared in chats, the stickers, the voice notes – they’re all stored on your phone. A popular game, after several updates and downloaded content, can easily balloon to several gigabytes. Many apps also create “cache” files, which are temporary data bits designed to help the app load faster. While useful, these can pile up unseen.
Photos and Videos: The Biggest Space Eaters
This is probably the most obvious one. Modern phone cameras are incredible, capturing high-resolution photos and stunning 4K videos. While fantastic for memories, these files are huge. A single minute of 4K video can take up hundreds of megabytes. If you’re like most people, you probably have thousands of photos and videos on your phone, many of which are duplicates, blurry shots, or things you only needed for a moment. They accumulate silently, becoming a massive storage hog.
Downloads, Documents, and Miscellaneous Files
Beyond apps and media, there’s a whole category of “other” files. These include documents you’ve downloaded from emails, PDFs, audio files, or even temporary files created by your web browser. Sometimes, when you download an app update, the old installation files might linger. Over time, these small files add up, quietly chipping away at your available storage. Even files you think you’ve deleted might sometimes leave remnants behind.
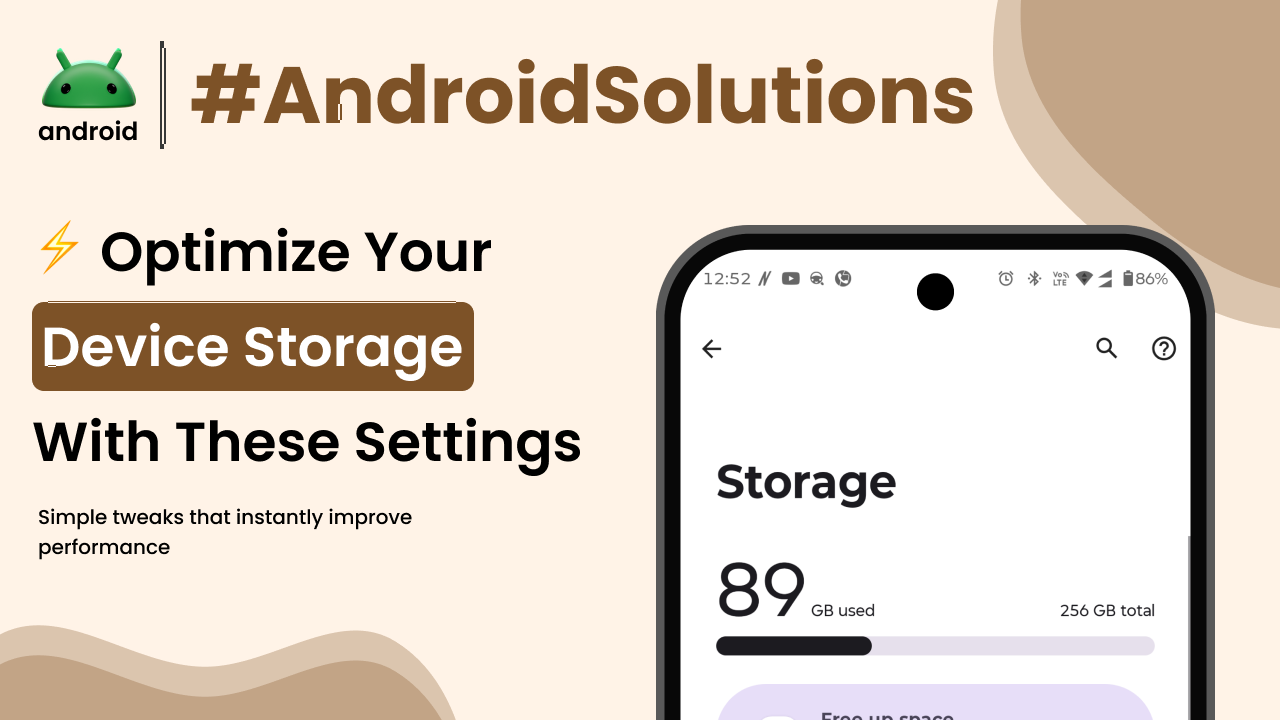
How to Check Your Android Phone’s Storage Status
Before you start any cleanup, you need to know exactly what’s occupying your phone’s space. Android makes this pretty straightforward.
Go to your phone’s “Settings” app. You’ll usually find this by swiping down from the top of your screen to open the quick settings panel and tapping the gear icon, or by finding the “Settings” app icon in your app drawer. Once in Settings, look for an option like “Storage,” “Storage & Memory,” or “About Phone” (and then “Storage”).
Tapping on this will bring up a visual breakdown of your storage use. You’ll see categories like “Apps,” “Images,” “Videos,” “Audio,” “Documents,” and “System files.” This visual representation is incredibly helpful because it immediately shows you which categories are taking up the most room, giving you a clear target for your cleanup efforts. You might be surprised to see how much space “Apps” or “Videos” are actually using. Sometimes, understanding certain important Android terms can make navigating these settings a bit easier.
Practical Solutions to Free Up Android Storage
Now for the good part – actually fixing the “storage full” issue. These solutions are presented in a logical order, starting with the easiest and most impactful steps.
1. Clearing App Cache and Data
This is often the quickest way to reclaim a significant chunk of space without deleting your precious memories or uninstalling essential apps. Every app creates temporary files (cache) to speed things up. Over time, this cache can grow massive.
To clear an app’s cache:
- Go to “Settings” > “Apps” (or “Apps & notifications,” “App management”).
- Tap on an app that you use frequently, especially social media apps or browsers.
- Select “Storage” or “Storage & cache.”
- You’ll see options for “Clear cache” and “Clear data.” Always start with “Clear cache.” This won’t delete any of your personal information within the app.
- Repeat this for several of your most-used apps. You’ll often be amazed at how much space this frees up.
“Clear data,” on the other hand, is a more drastic step. It effectively resets the app to its fresh-installed state, deleting all user data, settings, and logins associated with it. Only use “Clear data” if “Clear cache” doesn’t help and you’re prepared to log back in and set up the app again. For example, clearing data for a game would delete your saved progress unless it’s backed up to the cloud.
2. Uninstalling Unused or Seldom-Used Apps
We all have apps on our phones that we downloaded once and never touched again. Or maybe you tried a game for a week and got bored. These apps still take up space.
Go back to “Settings” > “Apps.” Scroll through your list of applications. If you see an app you haven’t opened in months, or one you genuinely don’t need, tap on it and select “Uninstall.” This frees up not just the app’s initial installation space, but also any data or cache it might have accumulated. Don’t be afraid to let go of apps you don’t use; you can always reinstall them later if needed.
3. Managing Your Photos and Videos
This is usually where the biggest gains in storage can be made.
Backup to Cloud Services
Services like Google Photos offer excellent solutions for backing up your photos and videos. Once backed up to the cloud, you can safely remove them from your device.
- Open Google Photos.
- Make sure “Backup & sync” is turned on in the settings.
- Once your photos are uploaded, you can use the “Free up device storage” option within Google Photos. This will delete the local copies of already-backed-up photos and videos, keeping them safely in the cloud for you to access anytime.
Other cloud storage options include Dropbox, OneDrive, or simply transferring them to your computer or an external hard drive.
Delete Duplicates and Unwanted Shots
Go through your gallery. Be ruthless! Delete blurry photos, screenshots you no longer need, duplicate images, and videos you’ve already shared or don’t want to keep. Many phones also have a “Recently Deleted” folder, where items sit for 30 days before permanent deletion. Remember to clear this folder too to fully reclaim the space.
4. Cleaning Up Your Downloads Folder
The “Downloads” folder is a notorious dumping ground for forgotten files. PDFs, images, music, or app installation files you only needed once can build up here.
To access it, open your phone’s “Files” app (it might be called “Files by Google,” “My Files,” or similar). Navigate to the “Downloads” section. Go through the list and delete anything you no longer need. You’ll be surprised how much old stuff accumulates here.
5. Using a File Manager to Spot Large Files
Sometimes, obscure files can take up significant space. A good file manager app (like Google’s Files app, which comes pre-installed on many Android devices) can help you find them.
The Files app often has a “Clean” tab that suggests files to delete, identifies large files, and points out duplicate files. Using this tool can help you pinpoint those unexpectedly large files that are consuming valuable storage. For example, you might find a large video file you recorded and forgot about, or a big zipped archive from an email.
6. Utilizing External Storage (If Your Phone Supports It)
If your Android phone has a microSD card slot, this is an excellent way to expand your storage permanently. You can move photos, videos, and even some apps to the SD card, freeing up internal space.
To move apps to an SD card:
- Go to “Settings” > “Apps.”
- Tap on an app (not all apps can be moved).
- Select “Storage” or “Storage & cache.”
- Look for an option to “Change” or “Move to SD card.” If it’s greyed out, that app cannot be moved.
Remember that an SD card is best for media files rather than critical app components, as read/write speeds can vary.
7. Resetting Your Phone (Last Resort)
If you’ve tried everything and your phone is still sluggish or full, a factory reset might be necessary. This completely wipes your phone, returning it to its “out-of-the-box” state. This is a drastic step and should only be done after backing up all your important data (photos, contacts, documents, app data) to the cloud or a computer. After a reset, you can selectively reinstall apps and restore data, avoiding the accumulation that led to the full storage problem. For more detailed instructions on backing up and resetting, you can refer to official Google Android support.
Developing Good Storage Habits
Preventing your Android storage from getting full is easier than constantly cleaning it. Here are some habits that can make a big difference:
- Regularly Review Apps: Every few months, go through your app list and uninstall anything you haven’t used.
- Embrace Cloud Storage: Make it a habit to back up photos and videos automatically to Google Photos or another service.
- Clean Downloads: Periodically check and clear out your downloads folder.
- Mind Your Media: Be mindful of the videos you record and the number of photos you take. Delete bad shots immediately.
- Use Storage Management Tools: Many Android phones have built-in “Smart Storage” features or the Google Files app’s “Clean” function that can automate some of these tasks for you.
By adopting a few of these simple routines, you can keep your Android phone running smoothly and prevent that frustrating “storage full” message from appearing. It’s about being proactive rather than reactive. If you’re interested in learning more about optimising your Android experience, there are many resources available online, including the homepage of androidskillspro.in, which offers a wealth of helpful articles.
Final Conclusion
Dealing with a full Android storage can feel overwhelming, but it’s a manageable problem with clear solutions. By understanding what takes up space – primarily apps, photos, and miscellaneous files – and adopting a systematic approach to cleaning and maintenance, you can significantly improve your phone’s performance and longevity. From clearing cache to judiciously managing your media and downloads, each step contributes to a healthier, faster device. It’s less about continually buying new hardware and more about smart digital housekeeping. With a bit of effort and consistent habits, your Android phone can continue to be the responsive and reliable companion you expect it to be.